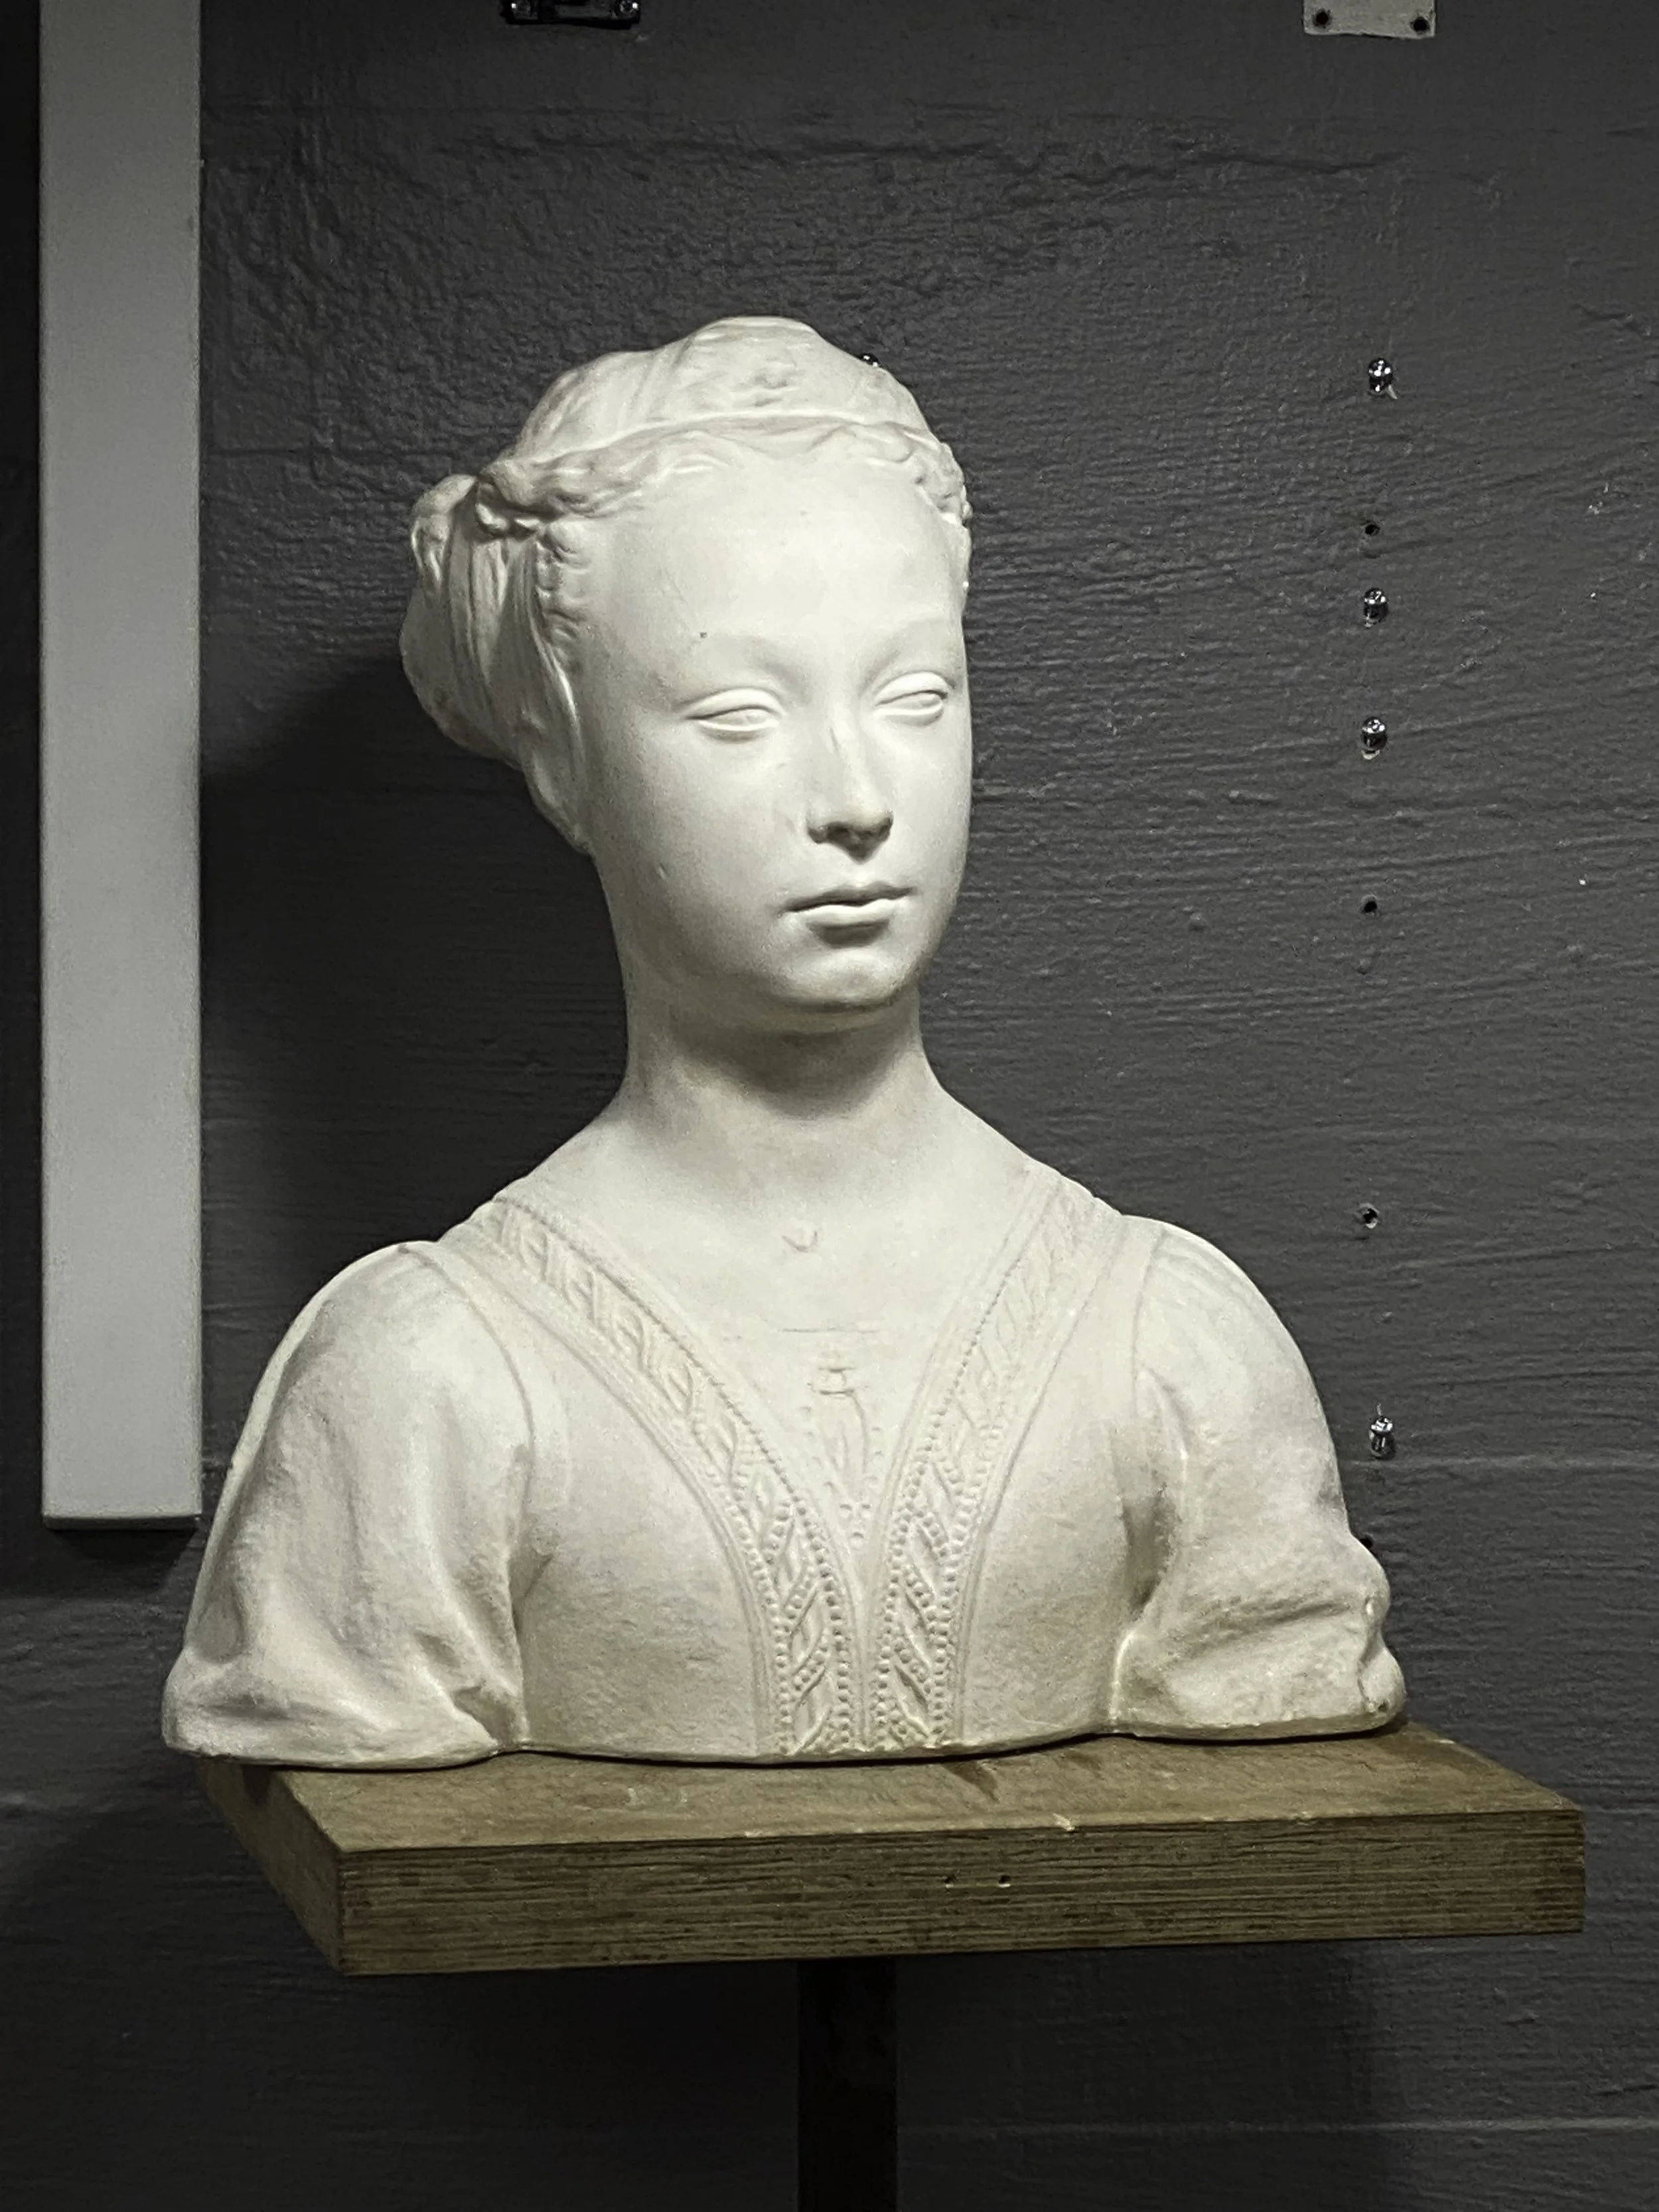
Today we continued working on portraits, adding the neck and shoulders to the head, in order to give a better sense of the character of the reference.
As always, we started with a summary of the steps to follow when approaching a subject.
Choose the height of your sketch on your page and find the width by comparing the height of the head with the width of various parts of the figure (head, shoulders, and so on).
Find the angle of the “cross” between the eye line and nose line, this gives the tilt of the head.
Find the three “planes” of the head (top, front, side) that are visible to you and shade based on the light source.
Find all of the “large” shapes by extending the lines and comparing to the reference visually until you are able to place the five shadow areas (brow above the eyes, bottom of the nose, bottom of the top lip, bottom of the bottom lip, bottom of the chin).
Only once all of this is accurate, begin to add details.
To begin with, we attempted to draw just a silhouette of a classmate in a small box. Each of us sat as a model while someone drew us, then the other drew that person as they sat as a model.
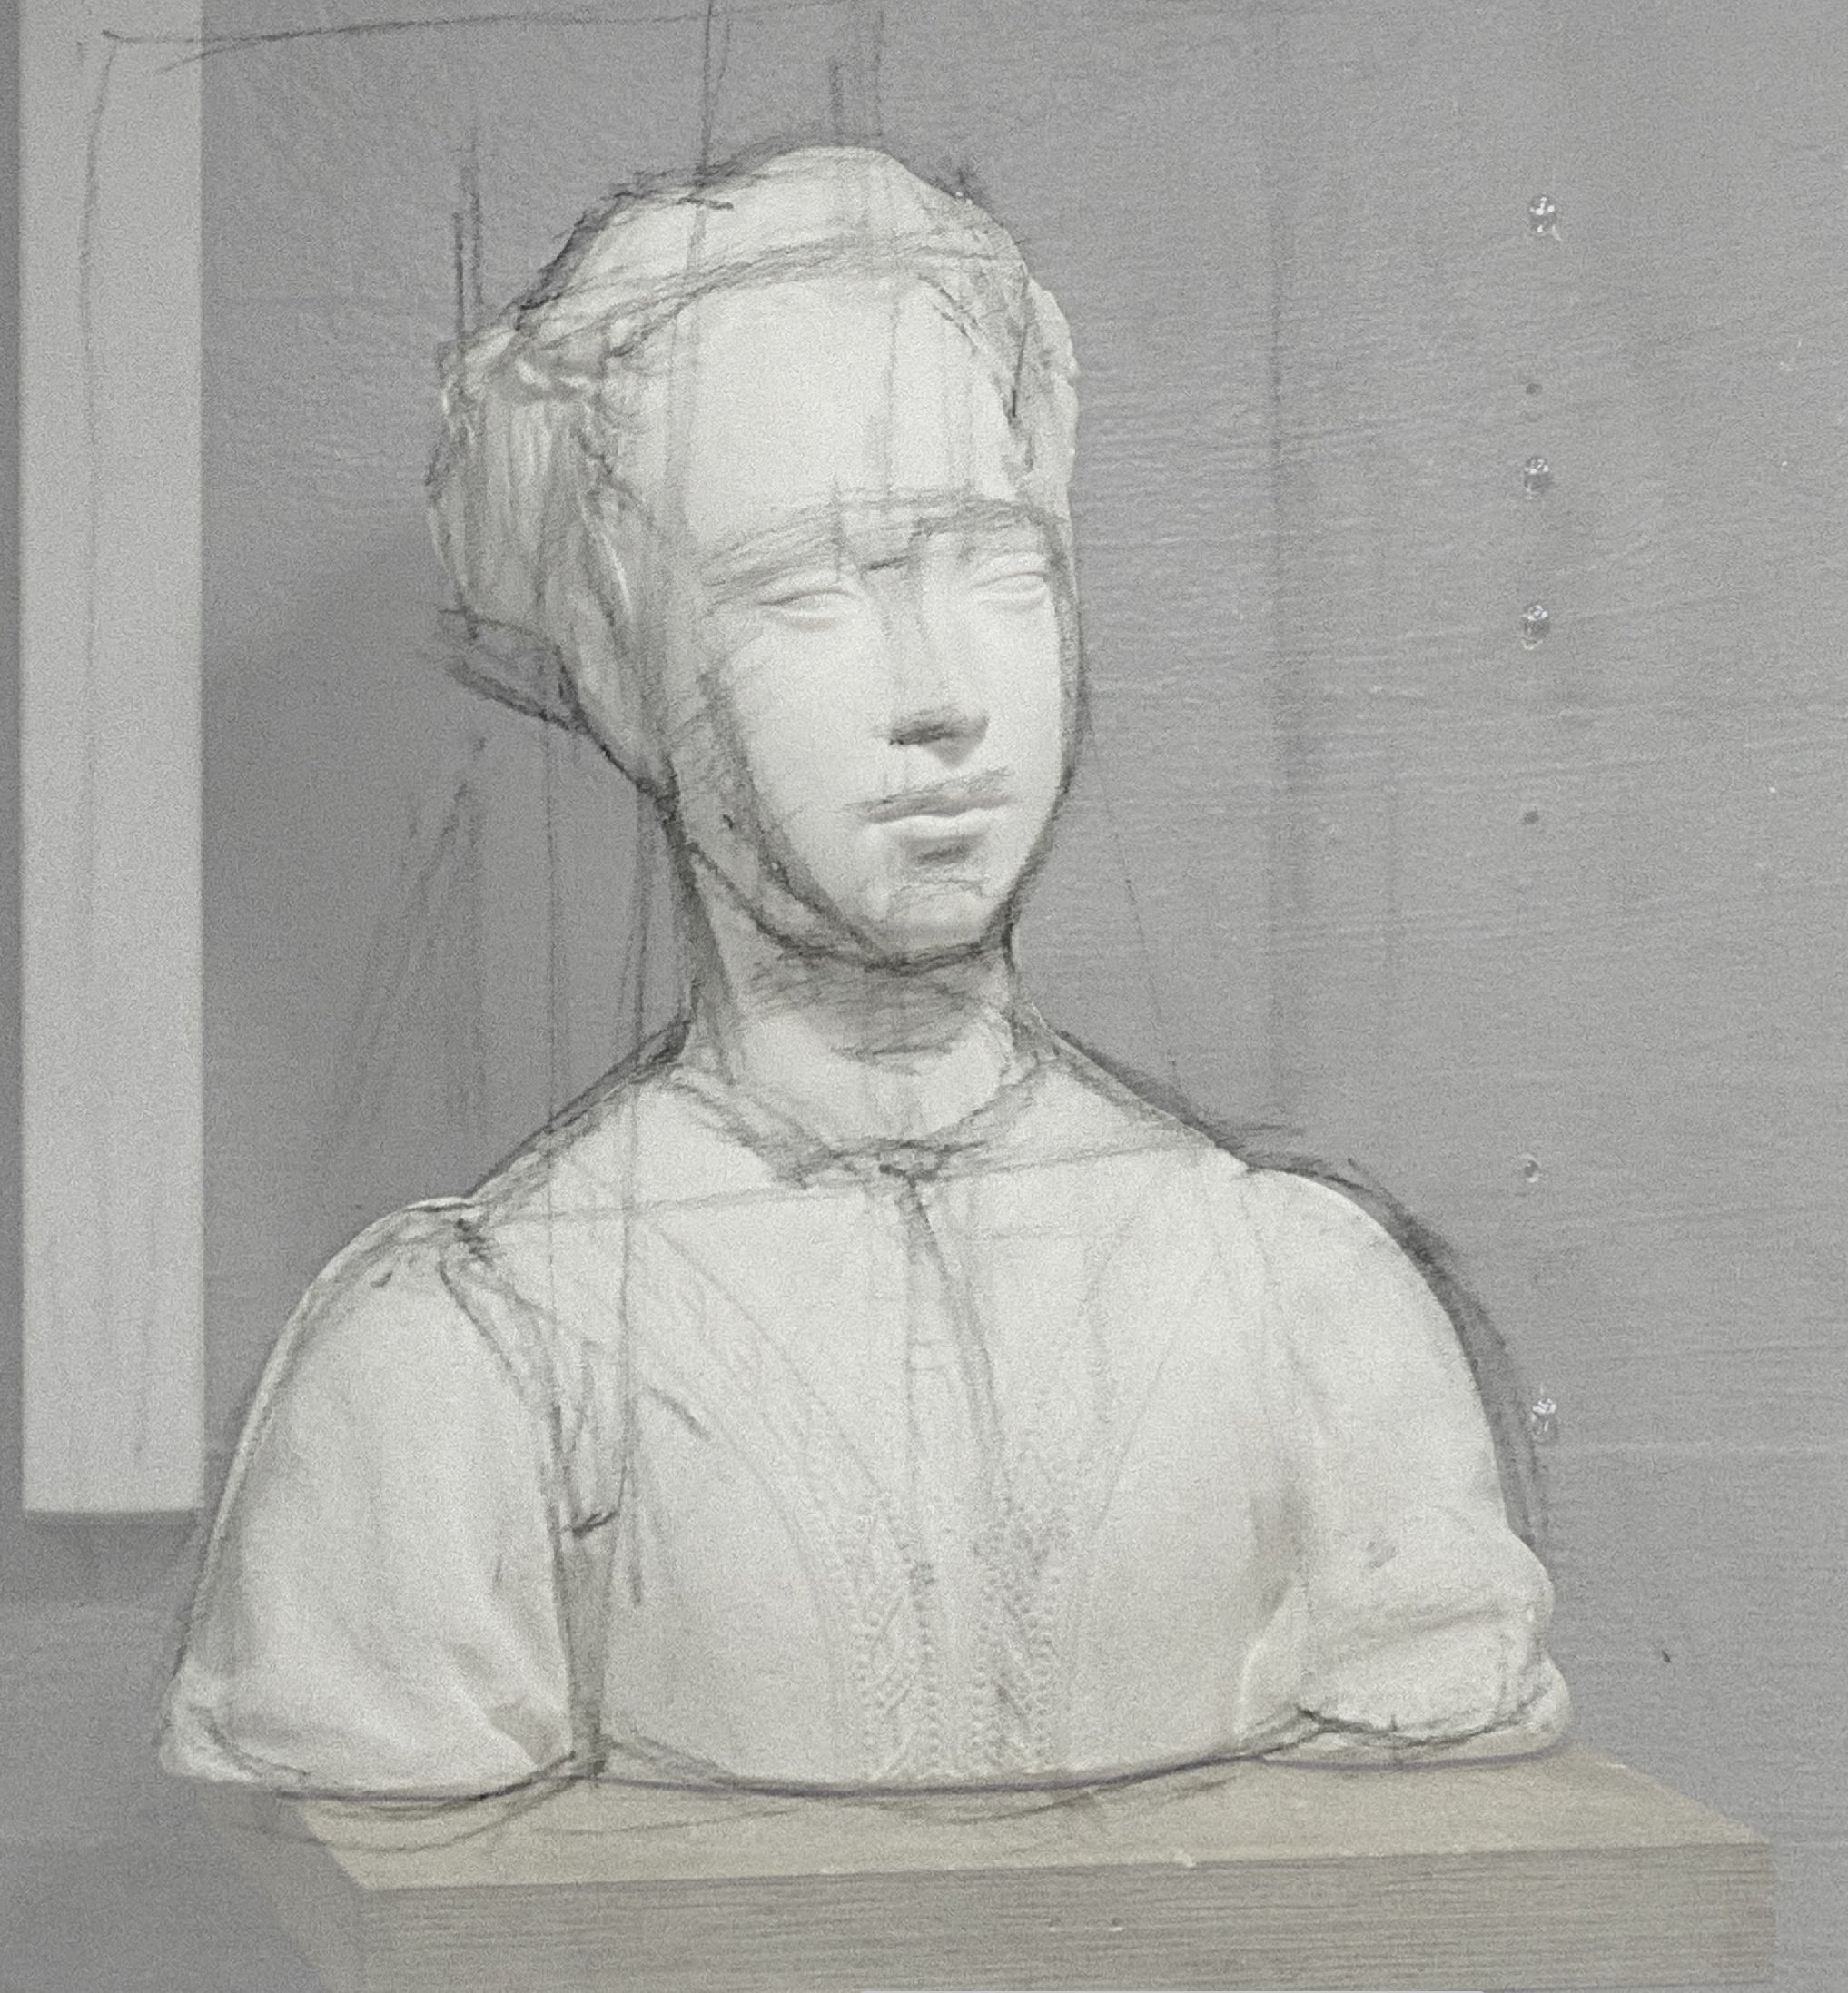
Finally, we attempted to draw the basic silhouette of a plaster bust.
As always, I struggled with everything. I could see that my lines were “wrong”. I just couldn’t easily see how to fix them. Based on instructor feedback, it seems that the “trick” is a mix of using visual cues while at the same time using what we “know”, though exactly when to use which isn’t always obvious.
I can see that my sketch of the bust makes the head too narrow, but only when I do the "overlay” comparison can I see that it is the position of the edge of the upper right that is “off”. My ability to compare the reality to my drawing remains too imprecise.